A WAN (Wide Area Network) Network Interface is the connection point between a local network (such as a LAN) and a broader, geographically dispersed network, like the internet or a corporate network that spans multiple locations.
To Create WAN Network Interface,
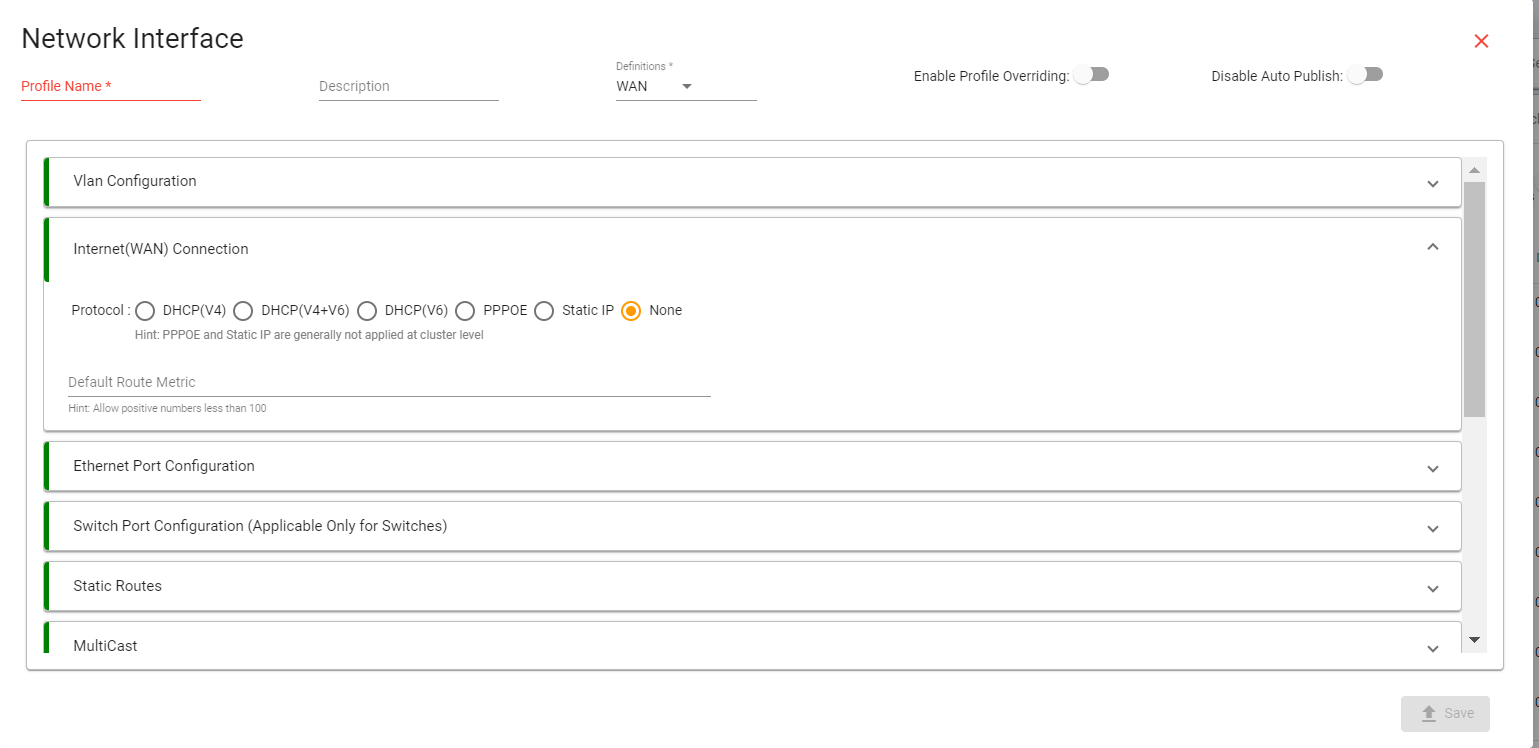
Go to Profile --> Network Interface--> click on +Create Network Interface.

Configure the Interface Settings
- Name: Enter a descriptive name for the interface (e.g., LAN_1, WAN_1).
- Description (optional): You can add a description to explain the purpose of the interface (e.g., "Primary LAN connection" or "WAN connection to the internet").
- On the Network Interfaces page, you will see options to create a WAN interface.

- Look for WAN connection option and click on it to begin configuring the WAN connection.
- Configure the Selected Protocol Based on your selection:
DHCP: The device will automatically receive an IP address from the DHCP server.
DHCP (V4+V6): The device will obtain IP Address automatically whichever (IPv4 or IPv6) is available.
PPPOE: Enter username and password for the PPPoE connection.
Static: Manually input the IP address, Subnet mask, Gateway, and DNS as required .
Note:
PPPOE and Static IP are generally not applicable at the cluster level.

1. To Create WAN Interface:
- In the Ethernet Port Configuration Tab, look for an option to select Hardware & Ports.
Choose the Hardware that you intend to configure as a WAN port.
- After selecting the device as WAN, a list of available ports will be displayed.
Choose the specific Port you want to configure for WAN

- Scroll down and click on the Advanced Tab.
- Click on "Gateway" from the dropdown to set the hardware as the gateway.

- Static Routes (optional)
- Click on Static Route option, Enable Static Route.
- Add the below parameter as per your requirements.
Target: Add Destination Ip Address
Netmask: Add Subnet mask of Destination Address
Gateway: Add Gateway Ip Address

- To change Speed and Duplex, Go to Speed and Duplex Configuration (optional)
Change from dropdown tab.

Once you have selected the appropriate option, click Save to confirm the configuration.
