NAT (Network Address Translation) is a technique used in networking to modify the source or destination IP addresses in data packets as they pass through a router or firewall. It allows private IP addresses (used within a local network) to be translated into public IP addresses for communication over the internet.
- Private to Public Translation: NAT allows multiple devices on a local network to share a single public IP address when accessing the internet.
- Types of NAT:
SNAT (Source NAT): Translates the source IP address of outgoing packets.
DNAT (Destination NAT): Translates the destination IP address of incoming packets.
- Common Use: NAT is commonly used in home and office routers to allow multiple devices to connect to the internet using one public IP address.
NAT helps conserve public IP addresses and provides an added layer of security by hiding internal network structures.
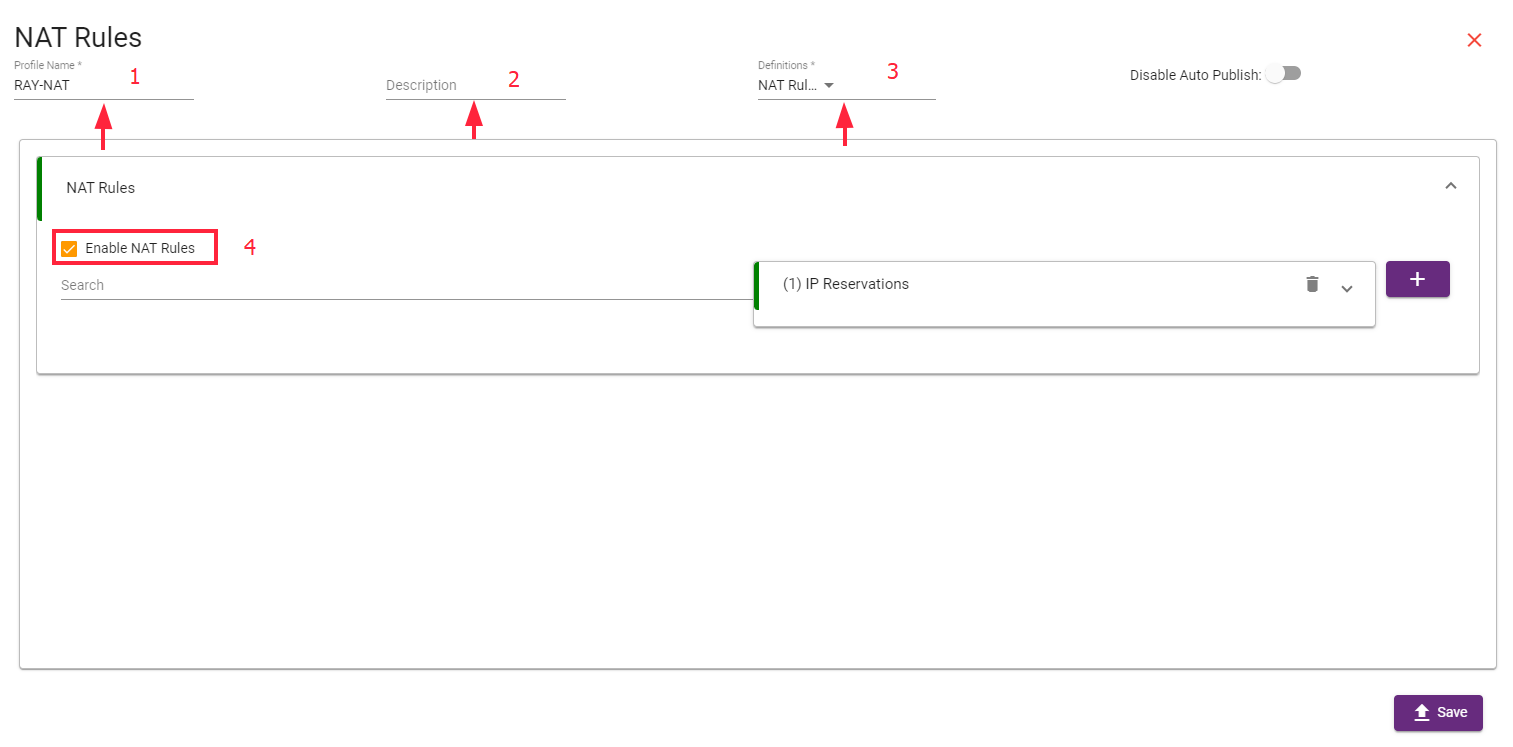
- Go to Profile---> Click on NAT Rules
In the NAT Rule section, click on the + Create NAT Rules button to create a new rule.

- Fill in the following fields:
Name: Enter a descriptive name for the NAT rule to help identify its purpose (e.g., "LAN to Public NAT").
Description (optional): You can provide an optional description to explain the rule's purpose (e.g., "This rule converts LAN private IP to public IP").
Under the Definitions tab, Select a NAT rule template that best fits your need.
Tick the checkbox to Enable NAT Rules.
- Click on the IP Reservation drop-down menu.
Assign a Nick Name for the IP reservation based on your naming preferences.
Add the IP Address of the LAN (Private IP address that you want to convert to a Public IP).
Enter the MAC Address of the LAN device that will use the NAT rule.
- Once you enable NAT, the configuration will direct you to the Ports section.

- In the Ports section, complete the following fields:
- Target: Choose the type of NAT rule, either SNAT (Source NAT) or DNAT (Destination NAT).
- Port Name: Enter a specific name for the port.
- External Port: Define the external port number on the public IP address that external devices will use to connect to the NAT device (e.g., port 80 for HTTP, port 443 for HTTPS).
- Internal Port: Specify the internal port number for the device within the private network that the NAT device will forward incoming requests to.
- Destination IP: Enter the WAN public IP address of the destination device.
- Select the LAN & WAN Interface Profile that will be used for the rule.
- Select the Protocol for the rule, such as:
TCP & UDP, TCP, UDP

After completing all the configuration details, click on the Save button to apply the NAT rule.